 English | EN
Introduction
In this article I will show how to create a simple serverless Api based on Azure Functions and Azure Table Storage. This is 3 parts guide. In Part 1 I will concentrate on local development.
What are Azure Functions & Azure Table Storage
- Azure Functions – is a serverless solution for running functions. Instead of worrying about deploying and maintaining servers, the cloud infrastructure provides all the up-to-date resources needed to keep your applications running.
- Azure Table Storage – A NoSQL key-value store for rapid development using massive semi-structured datasets. This is an extremely cheap service where you can store petabytes of data.
What are we going to build?
In this tutorial I will show how to build a simple WebApi for ToDo application. I will show the main concepts and a boilerplate code for mentioned technologies so you can expend this code wherever you need.
Create Project & Dependencies
I will be using Microsoft Visual Studio as IDE and I will be coding everything in C#.
In MS Studio choose create a new Project. In a list of Project Templates choose Azure Functions:

You can delete any out-of-the-box classes generated by Visual Studio.
The following dependencies need to be installed (you can choose the latest versions available on NuGet):
<PackageReference Include="Microsoft.Azure.WebJobs.Extensions.Storage" Version="4.0.4" />
<PackageReference Include="Microsoft.NET.Sdk.Functions" Version="3.0.11" />
Azure Table as Database
We will be using Azure Tables as a No-SQL database where we will store our ToDos. So first thing let’s create a code to work with it.
Create a new model class that will represent ToDo item in Azure Table. Each entity in Azure Table need to have PartitionKey & RowKey. Microsoft already created an entity that holds such values and we can inherit it:
using Microsoft.Azure.Cosmos.Table;
using System;

public class TodoTable : TableEntity
{
    public DateTime CreatedTime { get; set; }

    public string Title { get; set; }
}
Pay special attention that TableEntity needsto be referenced from Microsoft.Azure.Cosmos.Table. With a new SDK Azure Table will be referencing that same package as Cosmos Db.
Now let’s create a ToDo class. The user will just provide a ToDo title and our code will automatically generates ID & CreatedAt time info:
public class Todo
{
    public string Id { get; set; } = Guid.NewGuid().ToString();

    public DateTime CreatedTime { get; set; } = DateTime.UtcNow;

    public string Title { get; set; }
}
Plus let’s create a simple DataTransferObject (Dto):
public class CreateTodoDto
{
    public string Title { get; set; }
}
The last thing that we need to add here is an extension method that we will be using to Parse ToDo item into TodoTable item and vice versa.
public static class TodoExtensions
{
    public static TodoTable ToTable(this Todo todo)
    {
        return new TodoTable
        {
            PartitionKey = "TODO",
            RowKey = todo.Id,
            CreatedTime = todo.CreatedTime,
            Title = todo.Title
        };
    }

    public static Todo ToTodo(this TodoTable todoTable)
    {
        return new Todo
        {
            Id = todoTable.RowKey,
            CreatedTime = todoTable.CreatedTime,
            Title = todoTable.Title
        };
    }
}
Create POST Azure Function
Create a new class ToDoApi.cs and paste the following code:
    [FunctionName("Create")]
    public static async Task<IActionResult> Create(
        [HttpTrigger(AuthorizationLevel.Function, "post", Route = "todo")] HttpRequest req,
        [Table("todos", Connection = "AzureWebJobsStorage")] IAsyncCollector<TodoTable> todoTableCollector,
        ILogger log)
    {
        log.LogInformation("Adding new Todo");

        var requestBody = await new StreamReader(req.Body).ReadToEndAsync();
        var input = JsonConvert.DeserializeObject<CreateTodoDto>(requestBody);

        if (input.Title == null)
        {
            return new BadRequestObjectResult("Please provide Title");
        }

        var todo = new Todo
        {
            Title = input.Title
        };

        await todoTableCollector.AddAsync(todo.ToTable());

        return new OkObjectResult(todo);
    }
I will try to explain what this code does in details:
This code instracts that Function will be triggered on Http request. It accepts only POST requests and a route will be todo (server_name/api/todo).
Do not worry about AuthorizationLevel.Function, we will discuss this in next part where I will show how to deploy function to Azure. On your computer in Debug mode this will be ignored for now:
[HttpTrigger(AuthorizationLevel.Function, "post", Route = "todo")] HttpRequest req,This is a binding to Azure Storage Table. Our table name will be “todos” and connection string is defined in local.settings.json file that was automatically generated by Visual Studio. In Development mode (when you run locally) runtime will automatically creates the emulator for this services and we will discuss how to connect to real Azure services in Part 2:
[Table("todos", Connection = "AzureWebJobsStorage")] IAsyncCollector<TodoTable> todoTableCollector,This is just a demonstration how we can write logs through Azure Functions:
log.LogInformation("Adding new Todo");This code will parse body to CreateDto and creates a new ToDo object:
        var requestBody = await new StreamReader(req.Body).ReadToEndAsync();
        var input = JsonConvert.DeserializeObject<CreateTodoDto>(requestBody);

        if (input.Title == null)
        {
            return new BadRequestObjectResult("Please provide Title");
        }

        var todo = new Todo
        {
            Title = input.Title
        };
This code will save entity to database:
await todoTableCollector.AddAsync(todo.ToTable());Create Get Azure Function
Now let’s check how to retrieve all entities from database and show them to user:
    [FunctionName("GetAll")]
    public static async Task<IActionResult> GetAll(
        [HttpTrigger(AuthorizationLevel.Function, "get", Route = "todo")] HttpRequest req,
        [Table("todos", Connection = "AzureWebJobsStorage")] CloudTable cloudTable,
        ILogger log)
    {
        log.LogInformation("Getting All ToDos");

        TableQuery<TodoTable> query = new TableQuery<TodoTable>();
        var segment = await cloudTable.ExecuteQuerySegmentedAsync(query, null);
        var data = segment.Select(TodoExtensions.ToTodo);

        return new OkObjectResult(data);
    }
Pay attention to ExecuteQuerySegmentedAsync method. This method will retrieve first 1K entities from database. That is more than enough for our demonstration. If you want to get more entities you need to create a foreach cycle on top of it. You can find details on Microsoft official documentation.
Test API with PostMan
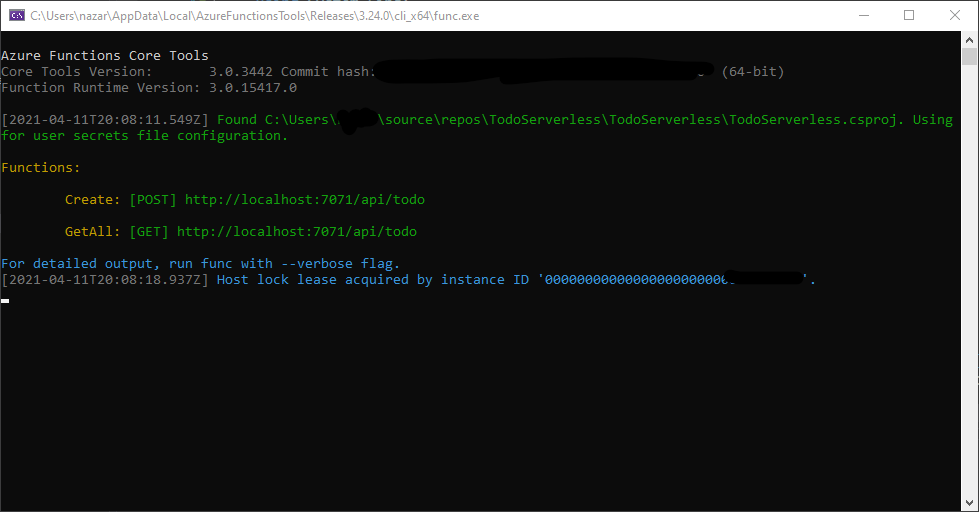
Run the project from Visual Studio. On first run a runtime will automatically create all necessary emulators and shows a console window like this:
Now you can test it with a postman.
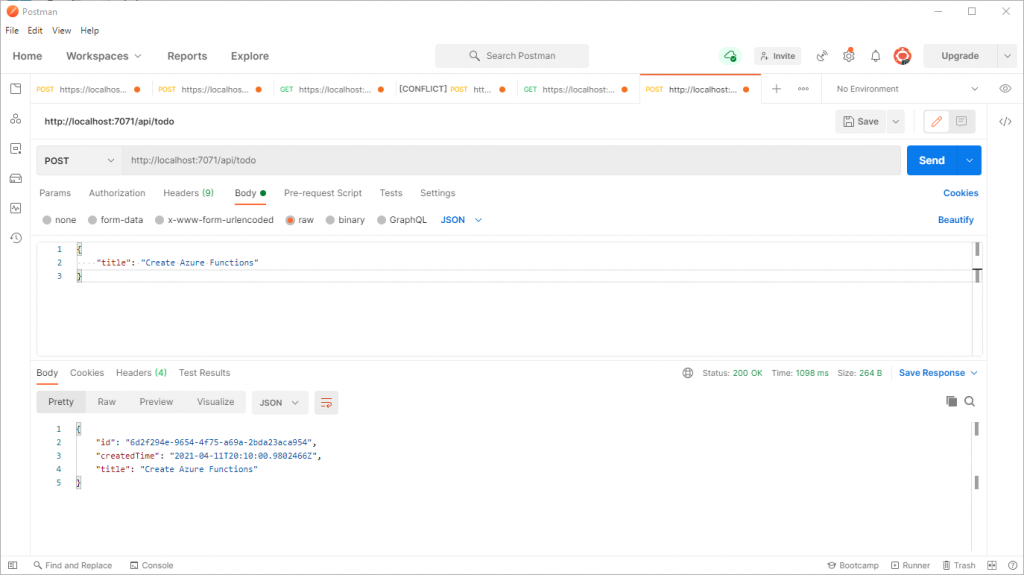
To create a new entity:
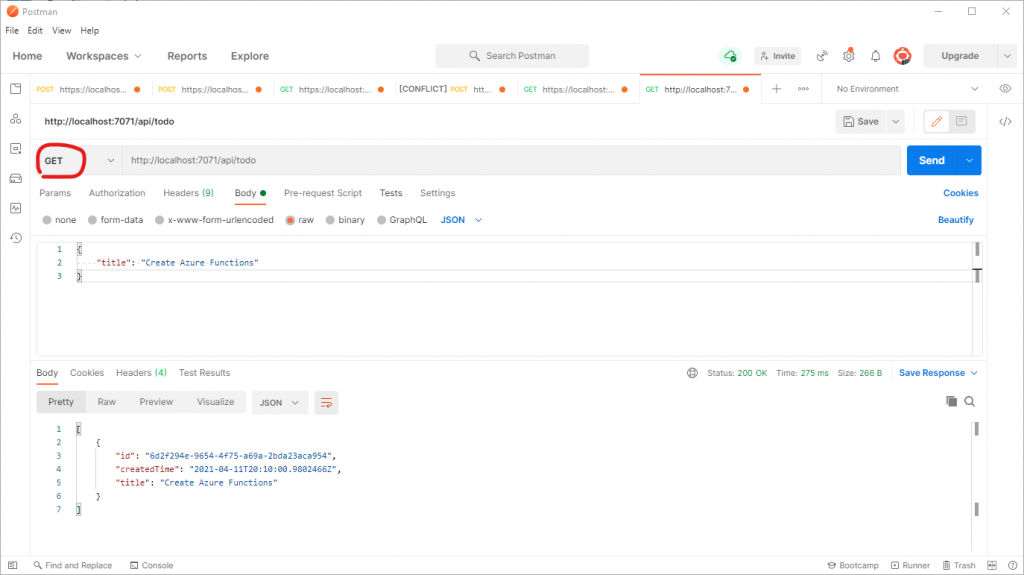
And to Get all created antities:
Our WebApi is ready! In Part 2 I will show how to create a real resources and deploy everything to Azure. Stay tuned!