 English | EN
Efficient data storage is one of the key pieces when drawing up your organization’s strategy, and solutions such as Azure Data Lake allow you to comply with current best practice recommendations regarding data architecture.
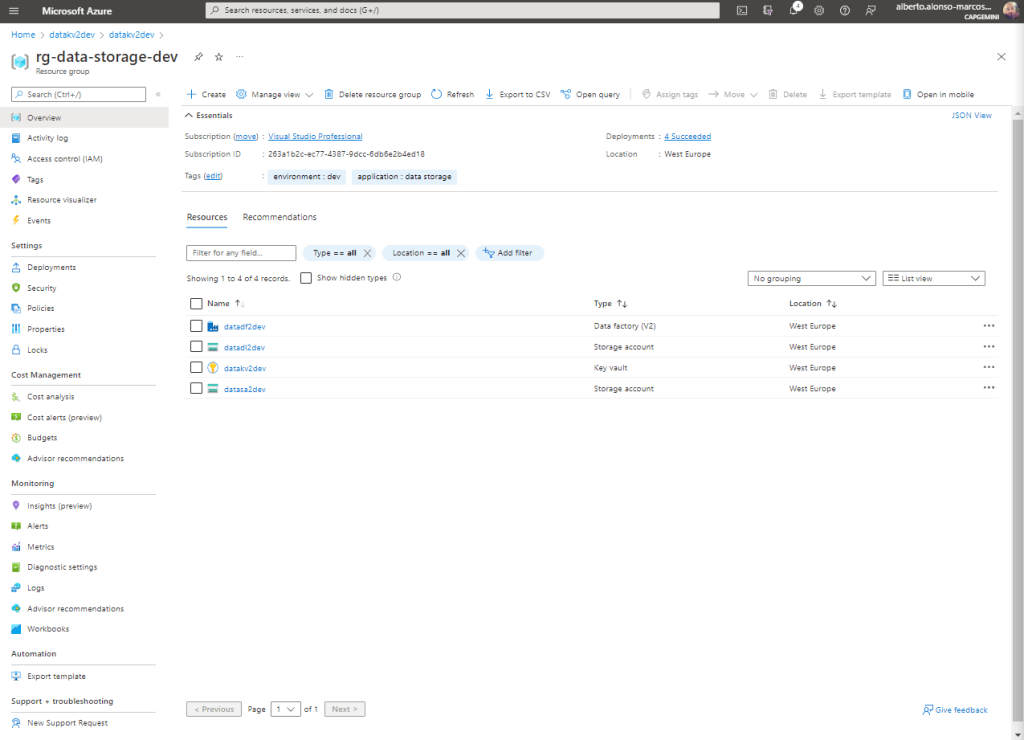
For this business case, I’m going to need a limited set of resources, as we see in the image below.
The exercise to be carried out will be to configure the dynamic movement of data between our Azure Storage Account (source) and Azure Data Lake Gen2 (destination) through Azure Data Factory. We will use Azure Key Vault to secure the connection strings to the resources and we will implement the process of copying files between components in a dynamic way. Finally, we will convert the source files in .json format to files in .parquet format, as these behave much more efficiently in mass storage solutions.
NOTE :
Remember that in order for Azure Data Factory to be able to use the secrets of the Azure Key Vault, you must include it in the Access Policies or it will return an error.
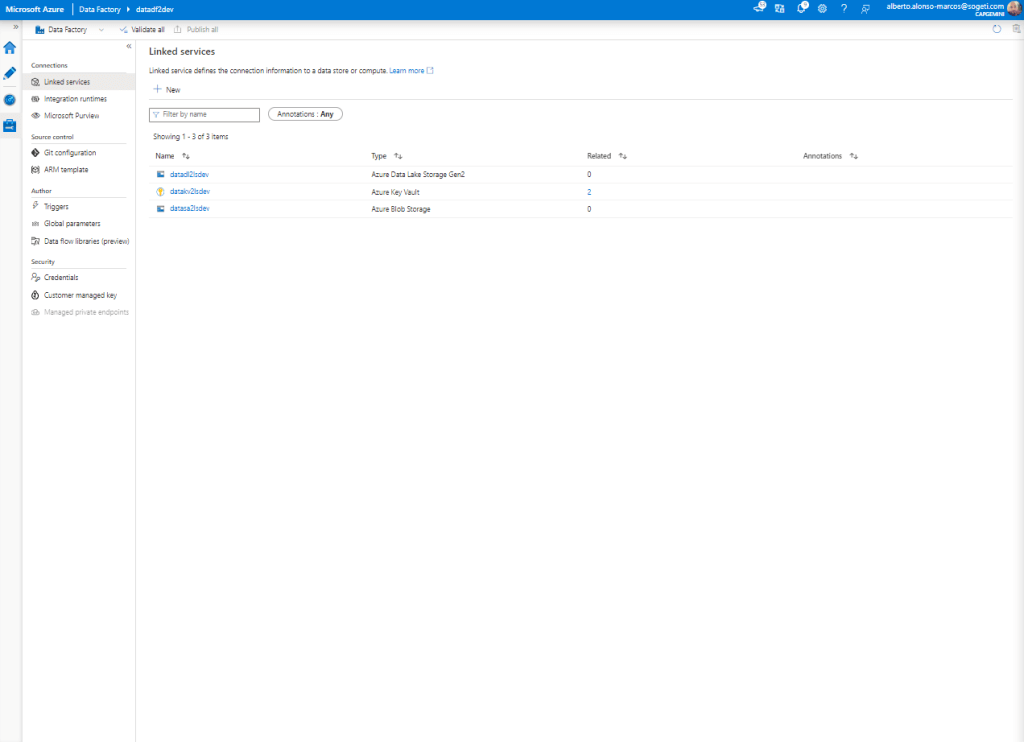
The first step is to configure the corresponding Linked Services in Azure Data Factory, as we see in the image below. We would have one for the Azure Storage Account, another for the Azure Data Lake and one more for the Azure Key Vault where we incorporate two secrets that will protect the Connection String of the first and the Access Key of the second.
The second step is to configure our Datasets in Azure Data Factory, in this case in a dynamic way. Let’s see how. The first thing is to know the structure of the source files (something like “customer_2021-01-01.json”) and how we would like to structure the folder hierarchy in our Azure Data Lake (something like “YYYY/MM”).
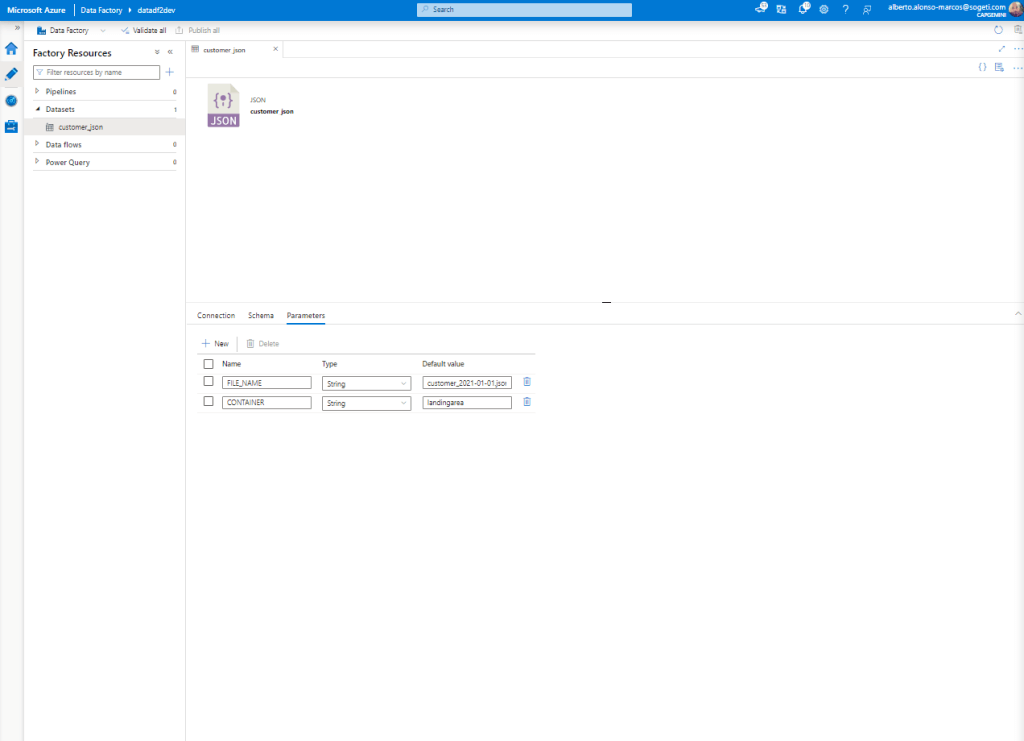
Once this part is known, the next thing is to proceed with the creation of the first Dataset. This takes as a source the Azure Storage Account. To make it act dynamically, we create a couple of parameters, as we see in the image.
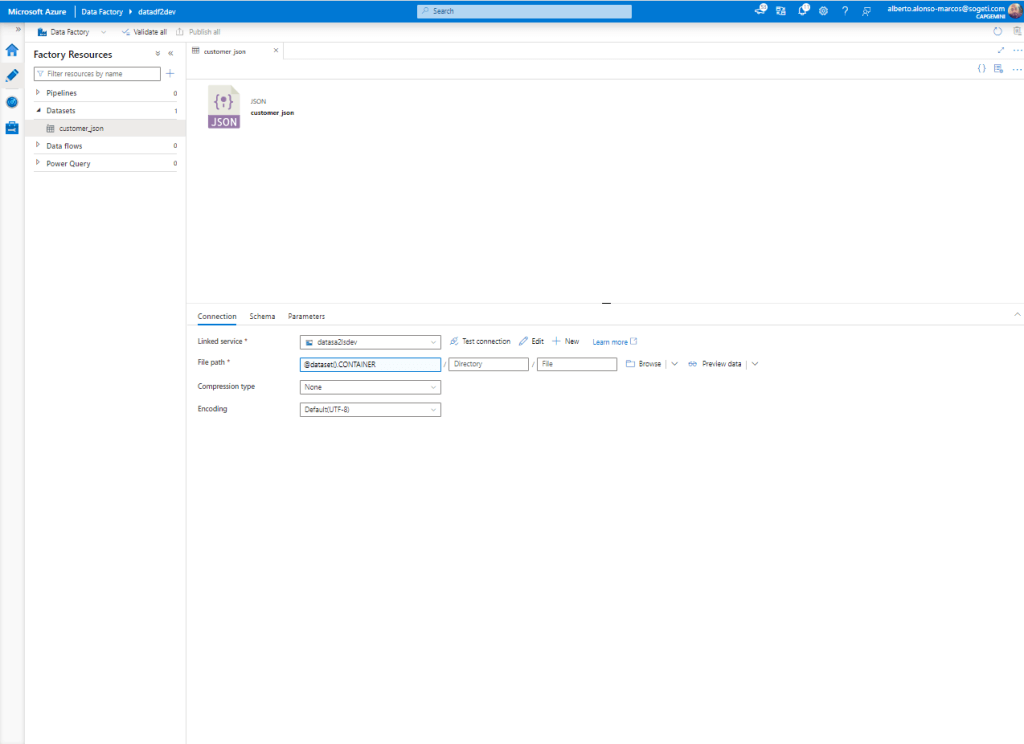
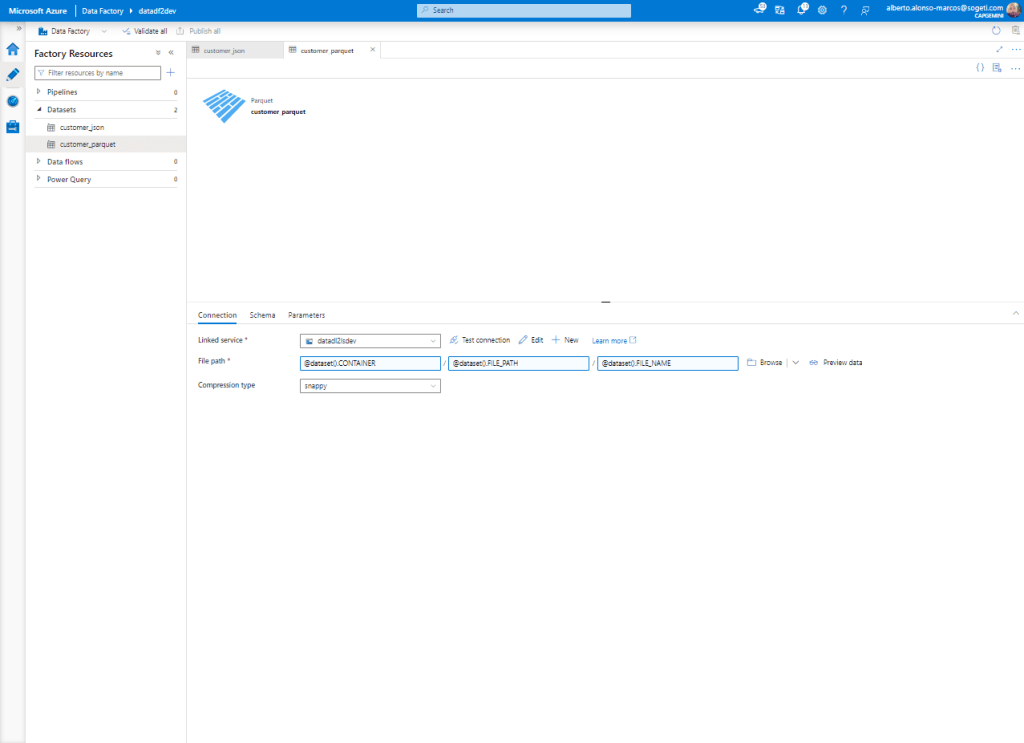
Next, we configure the connection to run dynamically. To do this, we complete the process by incorporating the information we see in the image.
At this point, we start with the configuration of the Dataset corresponding to Azure Data Lake. In this case, we add three parameters by which we can dynamically execute the load on our data store.
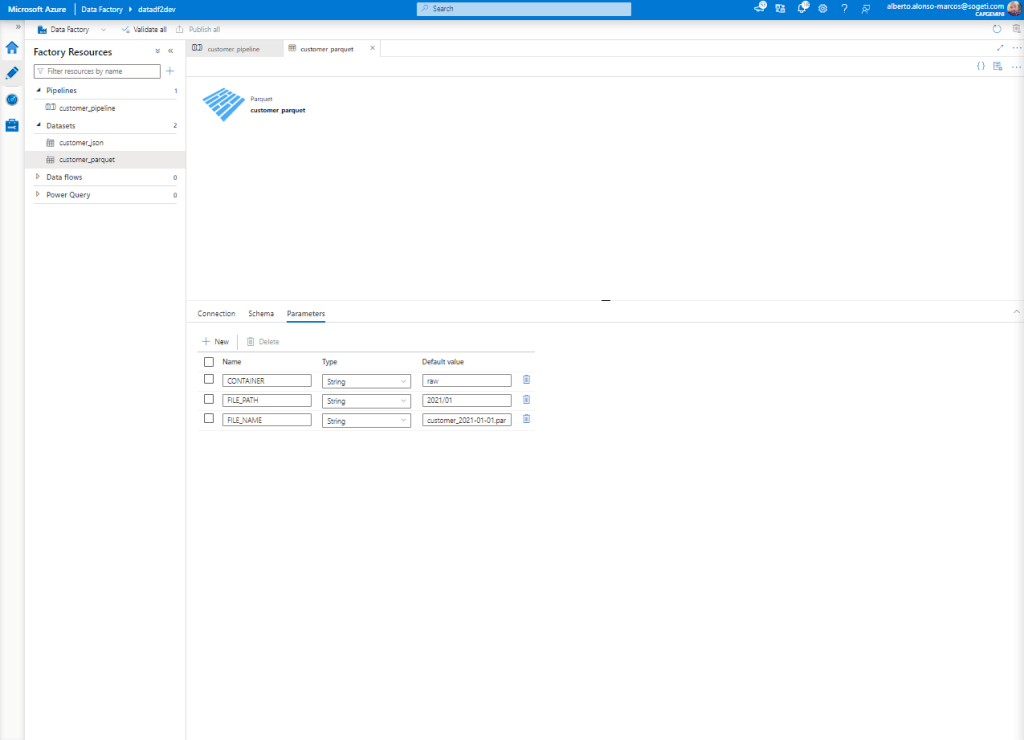
Now all that remains is to configure the dynamic content of our Dataset, we see how it looks in the image below.
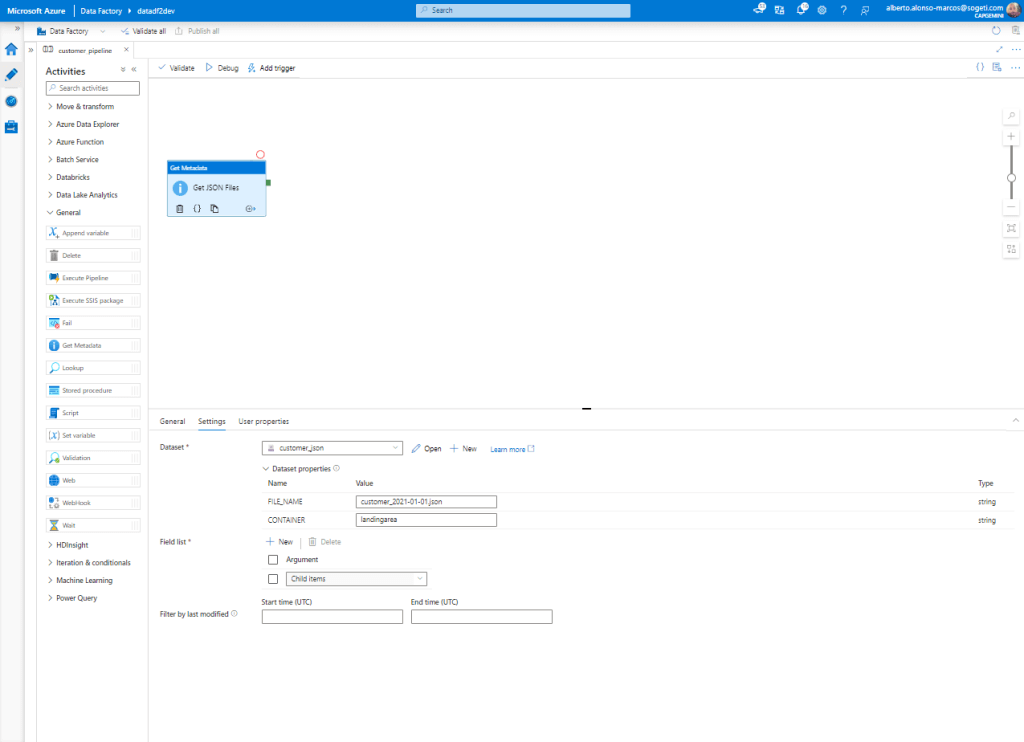
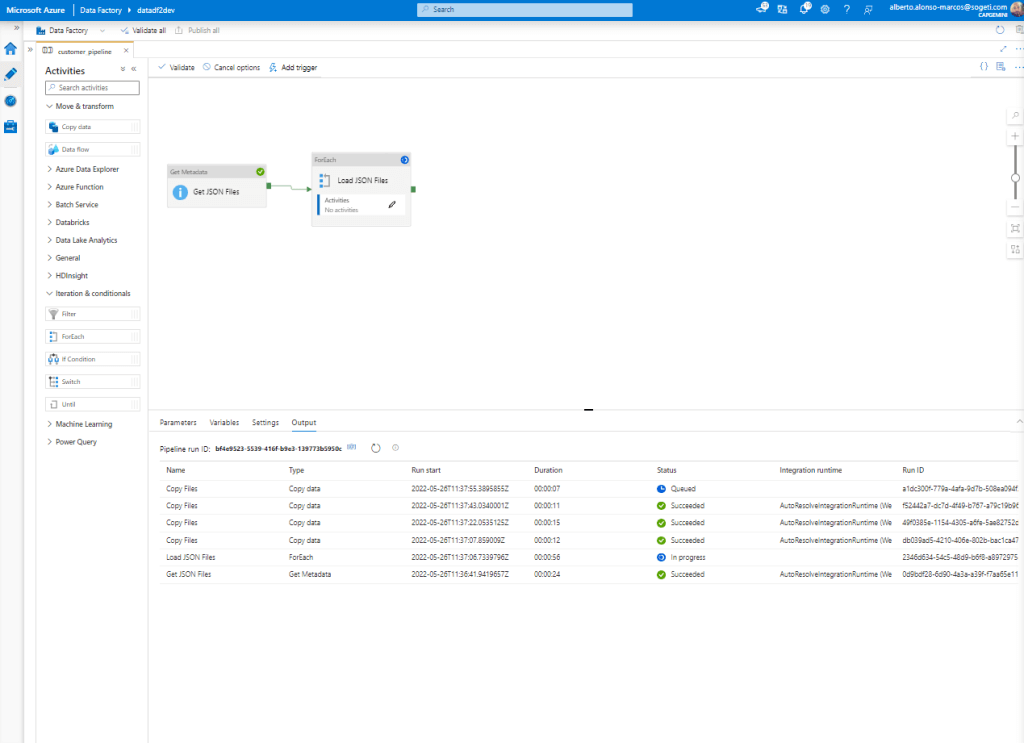
Once the creation of the Datasets is completed, we begin with the preparation of the Pipeline. The first activity is of the Get Metadata type. It connects to the source Dataset and extracts all the “child” elements. It would look something like the image below.
The next step is to configure an iterator of type “For Each” so that it moves each element from the origin.
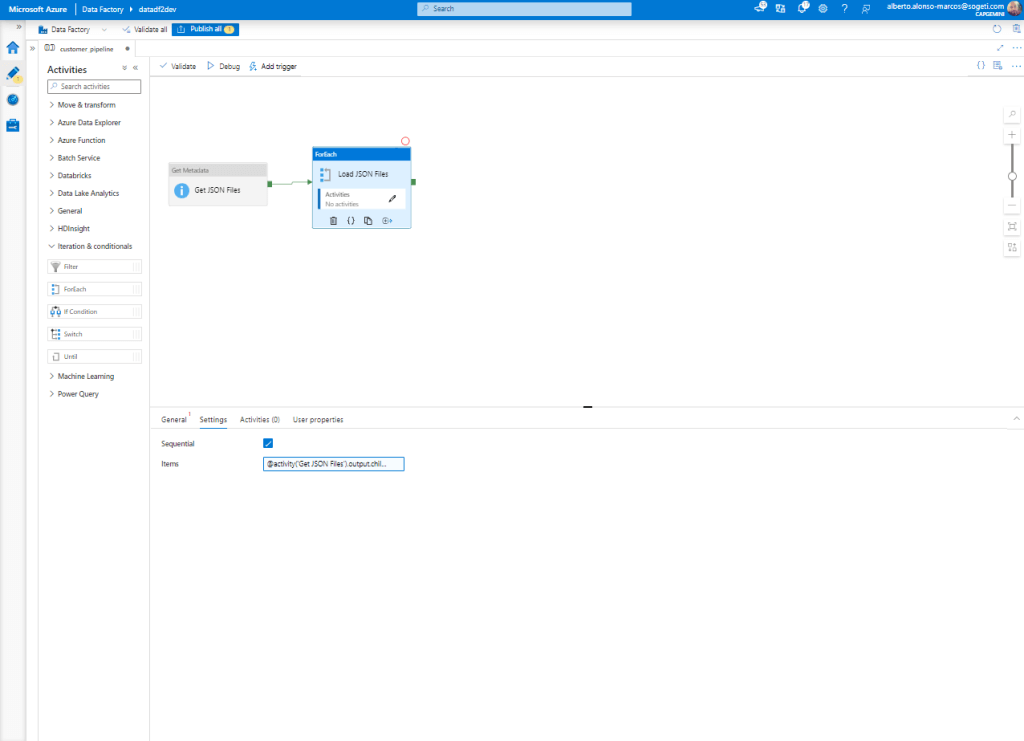
NOTE: We select the «Sequential» check so that the task is only executed if the previous one was successful.
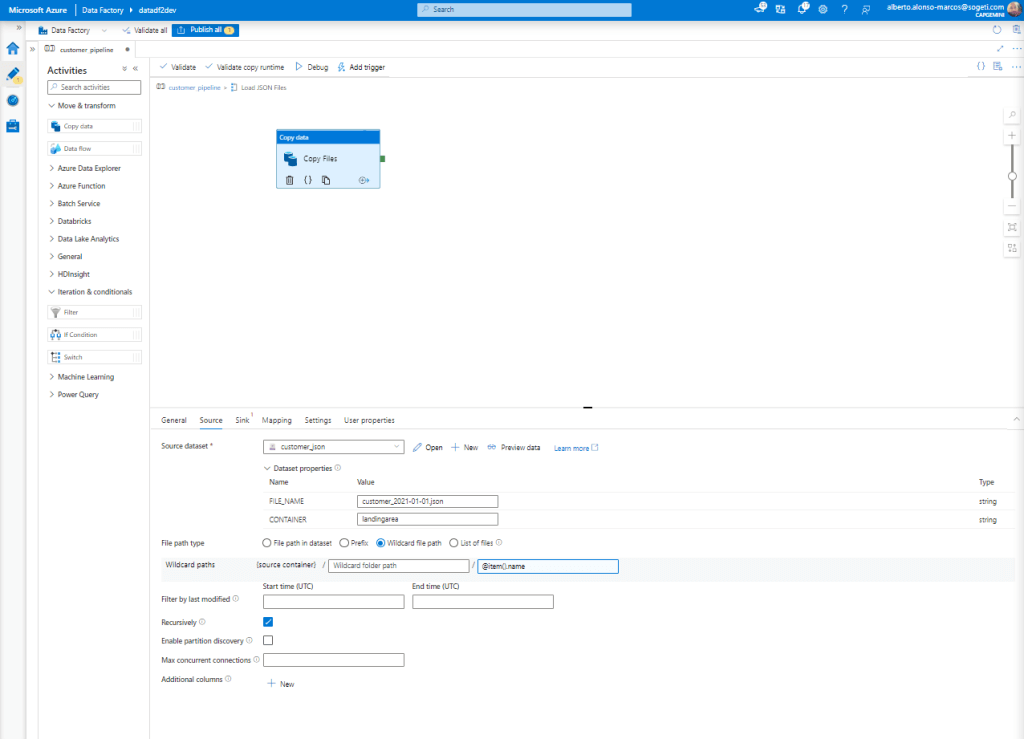
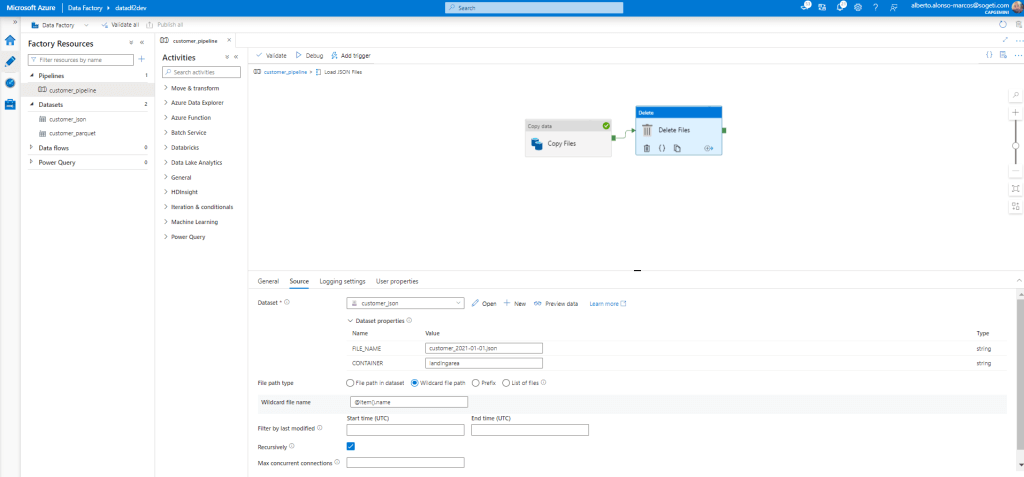
Now we only have to complete the activity to be carried out within the “For Each” loop. This is a “Copy Files” that will originate from our Azure Storage Account. To run dynamically, select the “Wildcard file path” option and in the file name, we will include @item().name as shown in the picture.
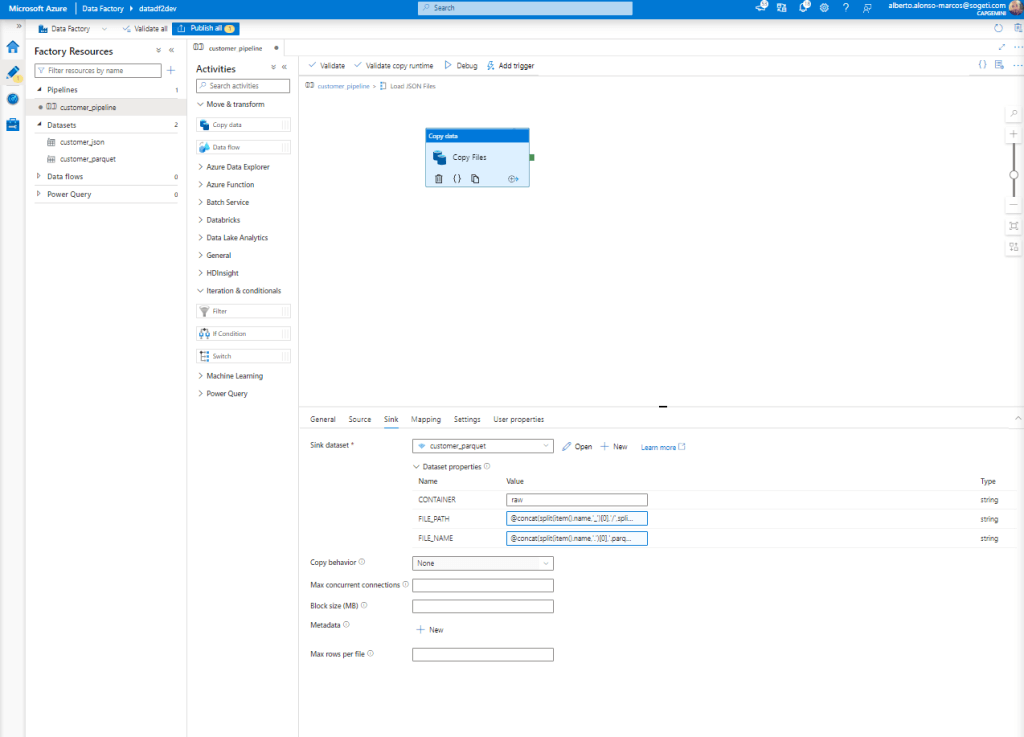
Now we only have to configure the destination, which will be our Azure Data Lake. In the process it will be carried out dynamically, for this in the Value of FILE_PATH we will include:
@concat(split(item().name,'_')[0],'/',split(split(item().name,'_')[1],'-')[0],'/',split(split(item().name,'_')[1],'-')[1])And in the case of the FILE_NAME we will incorporate:
@concat(split(item().name,'.')[0],'.parquet')Leaving something like what we have in the image below.
It would only be necessary to do the Mapping between sources including the name of any of the source files and that’s it.

Once the Pipeline is completed, click on “Debug” and check that there are no errors.
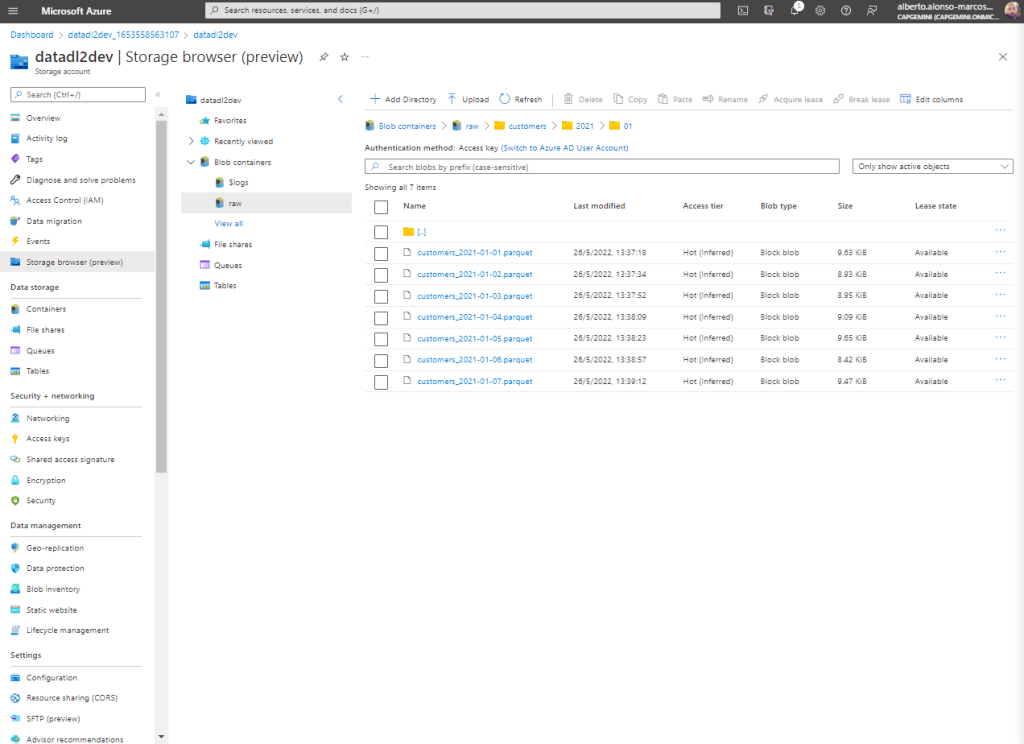
Finally we verify that the information is being uploaded correctly to our Azure Data Lake.
CONCLUSION
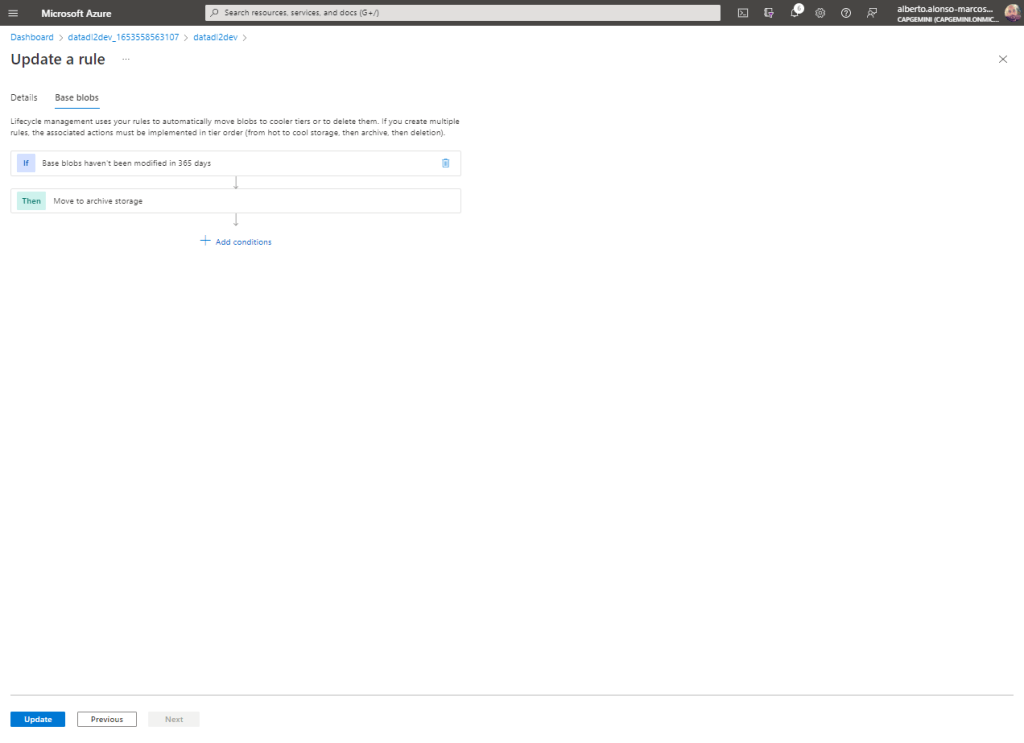
This simple example allows us to understand how to dynamically configure the hierarchical storage in our Azure Data Lake raw container, although it is a first step, since now it would be the start-up of, for example, Delta loads or the incorporation of «Lifecycle Management» rules. » to remove files and/or change the Tier type from Hot to Cold or Archive.
TIP
A simple way to clean the source Dataset as we move the information is to include a new activity of the type “Delete Files” after the one that copies the files to Azure Data Lake, passing only the @item().name as «Wildcard file name».
Cover photo thanks to Ihsan Adityawarman