English | EN
Intro
In this article, I will show how easy it is to create a CI for building and running tests for .Net Core & Angular application
What is Azure DevOps?
Azure DevOps is a SAAS CI software from Microsoft. It has a set of tool-chains for developing and deploying software.
You can create a free account and use up to 25 hours of build time for free for your project.
Create YAML file
Azure DevOps uses YAML files to control the pipeline. YAML is a human-readable data-serialization language. It is commonly used for configuration files and in applications where data is being stored or transmitted.
You can create a new ” azure-pipelines.yml” file in the root directory of your project.
Choose OS to run
You can choose several OS to build your project. Usually, it is Windows or Linux.
For Linux it will be:
pool:
  vmImage: 'ubuntu-latest'
For Windows:
pool:
  vmImage: 'windows-latest'
Set a list of variables
It is usually a good practice to set a list of variables that you would like to use across the pipeline. Try not to hard-code values or duplicate them across your script. Example for variables section:
variables:
  solution: '**/*.sln'
  buildPlatform: 'Any CPU'
  buildConfiguration: 'Release'
Restore .Net Core project dependencies
To build a project we need to restore all of its dependencies first. NuGet is used for that. We basically need two steps here:
- Install NuGet
- Run it against a solution to restore dependencies
steps:
- task: NuGetToolInstaller@1

- task: NuGetCommand@2
  inputs:
    restoreSolution: '$(solution)'
Build Solution
We can use a dotnet commands to build a solution
steps:
- script: dotnet build --configuration $(buildConfiguration)
  displayName: 'Build .Net Solution'
Run Unit Tests
Unit tests run is an essential part of any CI process. We can use a dotnet command “test” for that and point it to the project with unit tests.
- task: DotNetCoreCLI@2
  displayName: 'Run Unit tests'
  inputs:
    command: test
    projects: '**/NUnitTests.csproj'
    arguments: '--configuration $(BuildConfiguration)'
Restore Angular dependencies
Now let’s move to Angular. Firstly we need to restore dependencies. We can use a node package manager NPM to restore dependencies for our Angular project. Just point it to a folder where Angular code is located
- task: Npm@1
  displayName: 'Restore Angular Dependencies'
  inputs:
    workingDir: [solution_folder]/[angular_folder]
    verbose: false
Build Angular project
We can build Angular code with the same npm package manager. This is a script for that:
- task: Npm@1
displayName: 'Build Angular'
inputs:
command: custom
workingDir: [solution_folder]/[angular_folder]
verbose: false
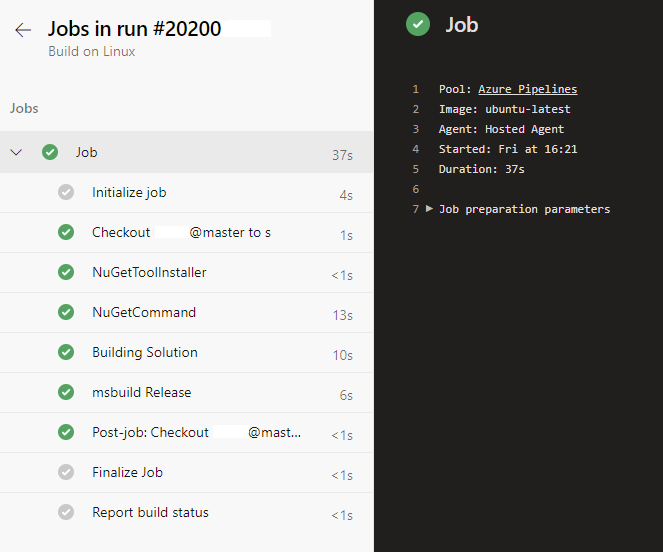
customCommand: 'run build'Run the Pipeline
That’s it! Use a created YAML file as an instructions for AzureDevops pipeline. After build is done you will receive a picture like that (depends on your steps). More information is available on Microsoft website with instructions for other languages (e.g. Java)