
As with Azure Solution Architect Expert , this will be the first of several entries on a topic that is increasingly in demand, and is also key in Advanced Analytics. I am referring to the design, configuration and implementation of the necessary components to configure the streaming layer of a Lambda architecture.
To do this, the first thing we need is to remember what the diagram of said architecture is like and for this, I will use the Modern Azure Data Platform , which I used a few days ago in the entry:
https://alb3rtoalonso.com/2021/01/ 16 / from-lambda-to-kappa-and-shot-because-it’s-my-turn /
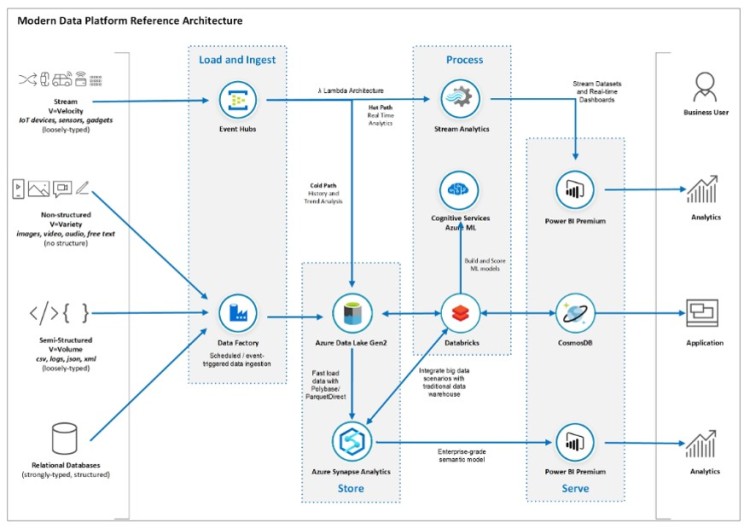
As can be seen, the streaming layer in which we are in the upper part of the diagram. Its starting point is the producers. That is, all those elements that generate data, which must be captured by us, such as sensors, IoT devices, smart devices, etc.
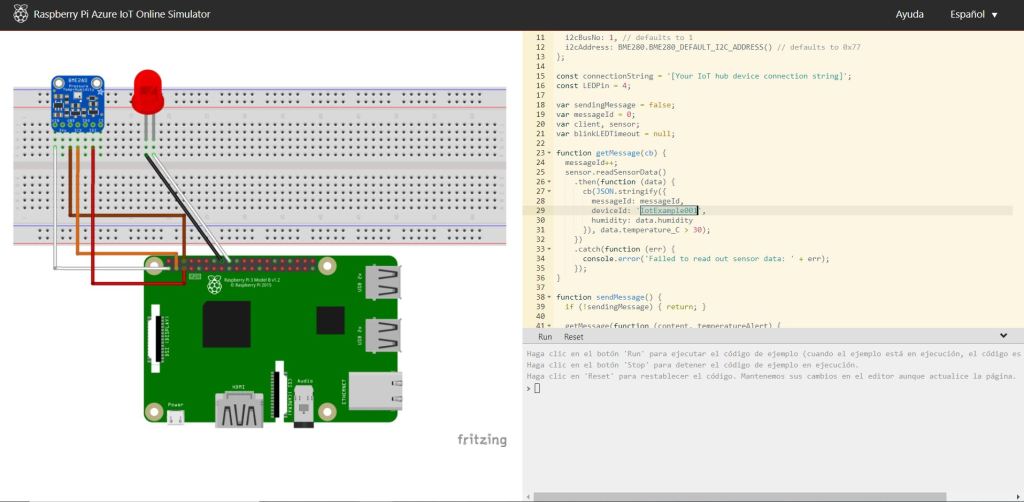
There are many occasions when we feel that we cannot advance in this discipline because we do not have such producers. However, there are multiple options to simulate them. For this post, I will use a simulator that Azure makes available to make your work easier and avoid having to program your own sensor.
To do this, you just have to access the following website, add the connection string of your Azure IoT Hub and press Run .
Source :
https://azure-samples.github.io/raspberry-pi-web-simulator/
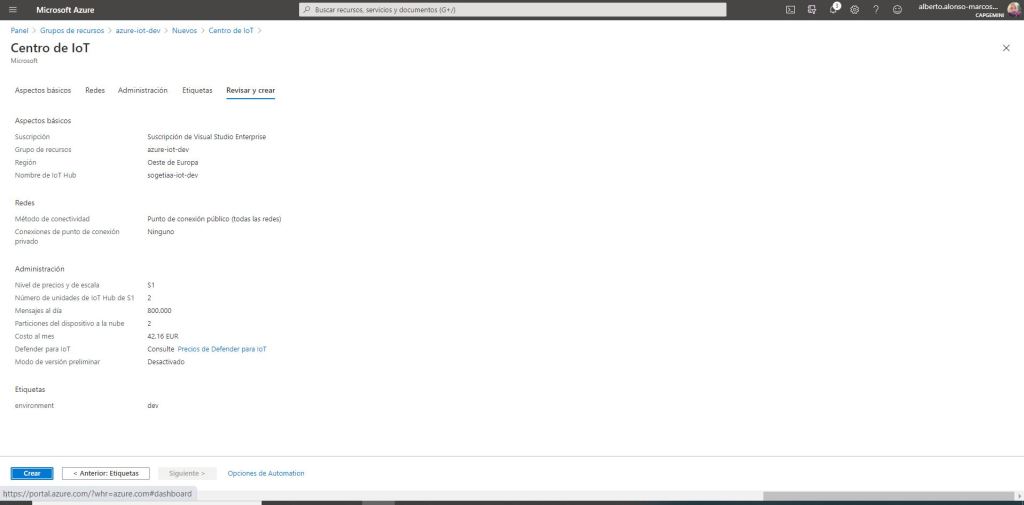
We have seen that we need to create an Azure IoT Hub , with what we put ourselves into it. The first thing is to create a resource group, which in this case will be called azure-iot-dev . Then, we start creating the resource.
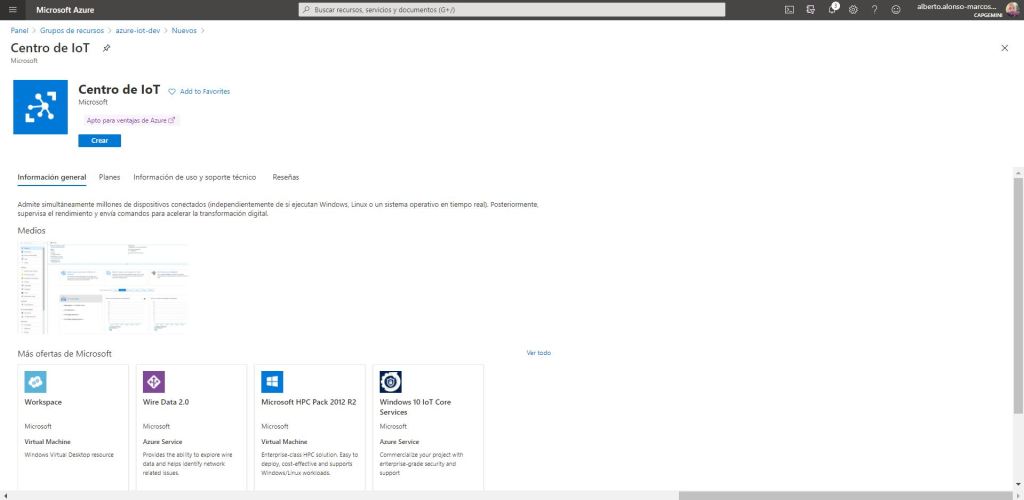
The next step is to name it and determine the location. In our case, sogetiaa-iot-dev and Western Europe.
NOTE :
It is important that the IoT Hub is as close as possible to the set of IoT devices that will generate the data to be captured.

Now we choose to make it accessible to all networks, since for our example we are not going to implement a private connection point.
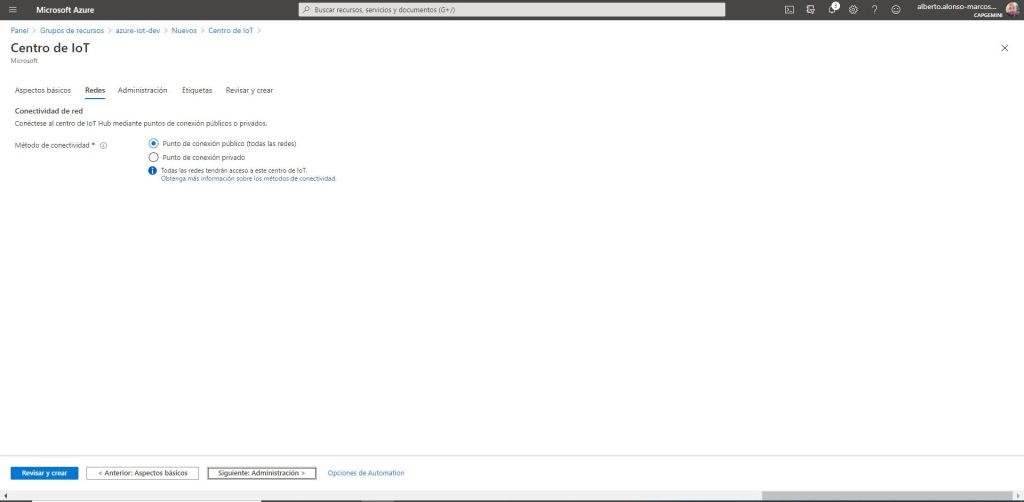
To get to the Administration section. Here it is very important to know the characteristics of our use case, in order to be able to estimate which is the price level and scale that we must select. To help us, Azure informs us in detail of the main characteristics of each of the plans.

In the example, we choose level S1 which will allow us to receive about 400,000 messages per day. However, as I mentioned before, it is very important to know the use case, since, in the advanced configuration section, we have the possibility to select the number of partitions to work with. That is, it allows us to choose from a minimum of 2 to a maximum of 32.
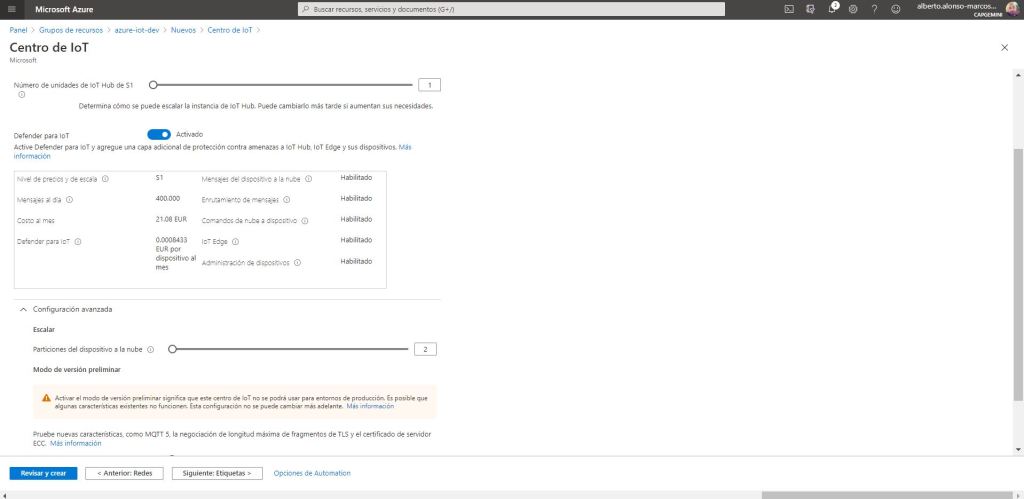
The number of partitions is closely related to the IoT Units, which to better understand it comes to be that 1 TU corresponds to 1 MB of input and 2 MB of output per second. We must also pay attention to the structure of the data that we are going to receive and if it includes some type of partitioning attribute that helps us to correctly distribute the information to be processed. For example when receiving temperature data from the same sensor, but from different areas of our machine and that we want to analyze separately.
To make the example more complicated, I will create two Raspberry Pi sensors by duplicating the simulator and renaming the devideid attribute . The first will have the identifier: IotExample001, while for the second it will be IotExample002.
Although it is not the case, because from this example sensor, only the temperature information comes, I will provision my Azure IoT Hub with two TUs and use the default configuration of the two partitions. I include the environment tag as dev and create it.
Once created, only the two IoT devices would be provisioned.

Access each of the newly created devices and copy the primary connection string. This will be the one that we must include in each of our Raspberry Pi sensors that we have previously configured.

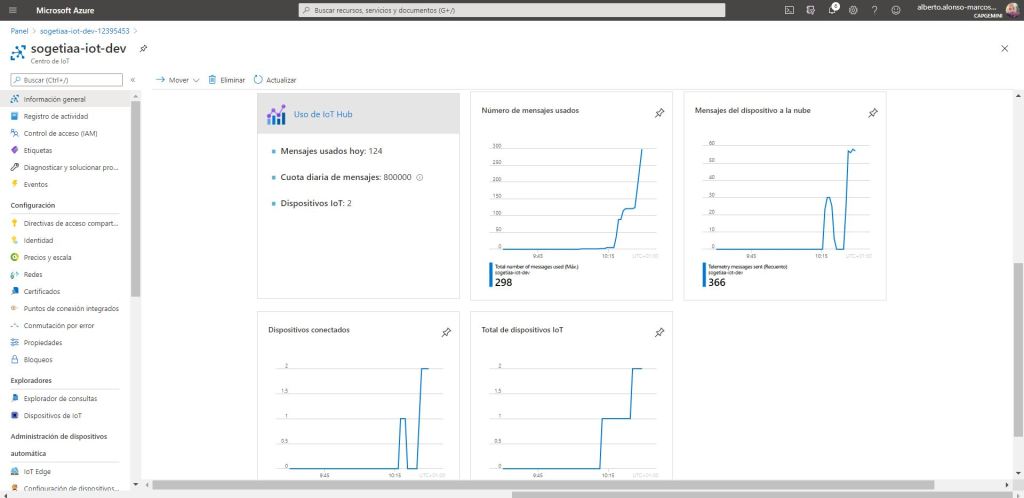
Finally, we would only have to start our two Raspberry Pi and verify that we receive the data in our Azure IoT Hub .
CONCLUSION :
This post provides a first starting point towards the integration of streaming services in data analysis architectures with Real Real Time capabilities . Of course, there is still a long way to go, but that is exactly what is so exciting about the world of technology.
In the next post I will talk about how to persist raw data using Azure Data Lake Gen2 . Since in IoT Hub they are only available for a period ranging from 1 to 7 days, unless it is a dedicated resource where we would go to a maximum of 90 days.

 English | EN